최근에 Spring Security를 구현하고 있는데, 기존의 Form 방식이 아니며, JWT 토큰을 사용하지 않고 REST API + 자동로그인을 구현하면서 실제로 어떤 클래스들이 동작하는지 그리고 구조를 더 이해하기 위해서 공부를 하는 겸
Spring Security 에 대해 추가적으로 포스팅합니다.
기본적인 동작구조는 아래 링크에 작성은 해뒀습니다.
https://awse2050.tistory.com/98?category=882914
Spring Security 동작 과정
JWT를 사용하기 전 여러모로 깨우친게 생겨서 추가로 정리하게 되었다. Spring Security 기반으로 JWT 를 사용하려면 Security 구현체를 직접 구현시켜서 사용해야 하기 때문에 어느정도 알 필요는 있다.
awse2050.tistory.com
1. 가장 먼저 로그인의 요청이 들어오면 추상적으로는 AuthenticationFilter 가 진행합니다.
실제로 로그인을 시도했을 때, 동작하는 메서드는 AbstractAuthenticationProcessingFilter.attemptAuthentication(..) 입니다.
private void doFilter(HttpServletRequest request, HttpServletResponse response, FilterChain chain)
			throws IOException, ServletException {
		//  생략
		try {
        	// 실제 로직진행 구간
			Authentication authenticationResult = attemptAuthentication(request, response);
			if (authenticationResult == null) {
				// return immediately as subclass has indicated that it hasn't completed
				return;
			}
			this.sessionStrategy.onAuthentication(authenticationResult, request, response);
			// Authentication success
			if (this.continueChainBeforeSuccessfulAuthentication) {
				chain.doFilter(request, response);
			}
            // 인증완료 이후 실행로직
			successfulAuthentication(request, response, chain, authenticationResult);
		}
		// 생략 - 예외처리 구간
	}
2. 여기서 attemptAuthentication(..) 은 AbstractAuthenticationProcessingFilter를 구현한 UsernamePasswordAuthenticationFilter 에서 실제 로직이 수행됩니다.
그리고 AuthenticationManager에게 인증에 대한 절차를 위임을 하는데, 이 때, 로그인 요청을 했을 때 전달받은 아이디와 패스워드를 가지고 인증 토큰인 UsernamePasswordAuthenticationToken 객체로 변환해서 인증을 요청합니다.
@Override
	public Authentication attemptAuthentication(HttpServletRequest request, HttpServletResponse response)
			throws AuthenticationException {
		if (this.postOnly && !request.getMethod().equals("POST")) {
			throw new AuthenticationServiceException("Authentication method not supported: " + request.getMethod());
		}
		String username = obtainUsername(request);
		username = (username != null) ? username.trim() : "";
		String password = obtainPassword(request);
		password = (password != null) ? password : "";
		UsernamePasswordAuthenticationToken authRequest = UsernamePasswordAuthenticationToken.unauthenticated(username,
				password);
		// Allow subclasses to set the "details" property
		setDetails(request, authRequest);
		return this.getAuthenticationManager().authenticate(authRequest);
	}
3. AuthenticationManager 또한 인터페이스이므로, 해당 인터페이스의 구현체에서 로직이 진행됩니다. 그 구현체는 ProviderManager 입니다. ProviderManager는 인증을 수행하기 위해서 등록되어 있는 여러 AuthenticationProvider 의 구현체 중에서 하나의 구현체를 통해 인증을 진행시킵니다.
@Override
	public Authentication authenticate(Authentication authentication) throws AuthenticationException {
		Class<? extends Authentication> toTest = authentication.getClass();
		AuthenticationException lastException = null;
		AuthenticationException parentException = null;
		Authentication result = null;
		Authentication parentResult = null;
		int currentPosition = 0;
		int size = this.providers.size();
        // 인증을 실제로 진행할 Provider를 찾는다.
		for (AuthenticationProvider provider : getProviders()) {
			if (!provider.supports(toTest)) {
				continue;
			}
			try {
				result = provider.authenticate(authentication);
				if (result != null) {
					copyDetails(authentication, result);
					break;
				}
			}
			// 예외 처리 구간.
		}
		if (result == null && this.parent != null) {
			// Allow the parent to try.
			try {
				parentResult = this.parent.authenticate(authentication);
				result = parentResult;
			} catch (...) {
			 예외 처리 구간
            }
		}
		if (result != null) {
			if (this.eraseCredentialsAfterAuthentication && (result instanceof CredentialsContainer)) {
				// Authentication is complete. Remove credentials and other secret data
				// from authentication
				((CredentialsContainer) result).eraseCredentials();
			}
			// If the parent AuthenticationManager was attempted and successful then it
			// will publish an AuthenticationSuccessEvent
			// This check prevents a duplicate AuthenticationSuccessEvent if the parent
			// AuthenticationManager already published it
			if (parentResult == null) {
				this.eventPublisher.publishAuthenticationSuccess(result);
			}

			return result;
		}
	}
4. 여기서 각 AuthenticationProvider의 구현체들은 자신이 인증을 처리할 수 있는 각자의 인증토큰이 존재합니다.
예를 들어, 자동 로그인을 처리하는 Provider인 RememberMeAuthenticationProvider의 supports 메서드 내용은 아래와 같습니다.
	@Override
	public boolean supports(Class<?> authentication) {
		return (RememberMeAuthenticationToken.class.isAssignableFrom(authentication));
	}
그래서, AuthenticationProvider 들 중에서 인증 객체 토큰을 처리할 수 있는 Provider를 찾고 그 Provider에서 구현한 authenticate 메서드를 통해서 인증을 시작하게 됩니다.
특별하게 개발자가 구현한 AuthenticationProvider 구현체를 등록하지 않았다면, 기본적으로 AbstractUserDetailsAuthenticationProvider가 동작을 하는데, 동작 과정에서 UserDetailsService를 호출하고 사용자 조회에 성공했으면 패스워드까지 일치했는지 확인해서 인증된 객체를 반환하는 작업을 DaoAuthenticationProvider가 합니다.
@Override
	public Authentication authenticate(Authentication authentication) throws AuthenticationException {
		Assert.isInstanceOf(UsernamePasswordAuthenticationToken.class, authentication,
				() -> this.messages.getMessage("AbstractUserDetailsAuthenticationProvider.onlySupports",
						"Only UsernamePasswordAuthenticationToken is supported"));
		String username = determineUsername(authentication);
		boolean cacheWasUsed = true;
		UserDetails user = this.userCache.getUserFromCache(username);
		if (user == null) {
			cacheWasUsed = false;
			try {
            	// DaoAuthenticationProvider가 수행
				user = retrieveUser(username, (UsernamePasswordAuthenticationToken) authentication);
			}
			catch (UsernameNotFoundException ex) {
			// 생략
		}
			// 생략
		return createSuccessAuthentication(principalToReturn, authentication, user);
	}
DaoAuthenticationProvider 의 메서드들
	@Override
	protected final UserDetails retrieveUser(String username, UsernamePasswordAuthenticationToken authentication)
			throws AuthenticationException {
		prepareTimingAttackProtection();
		try {
			UserDetails loadedUser = this.getUserDetailsService().loadUserByUsername(username);
			if (loadedUser == null) {
				throw new InternalAuthenticationServiceException(
						"UserDetailsService returned null, which is an interface contract violation");
			}
			return loadedUser;
		}
		// catch 생략
	}
@Override
protected Authentication createSuccessAuthentication(Object principal, Authentication authentication,
UserDetails user) {
boolean upgradeEncoding = this.userDetailsPasswordService != null
&& this.passwordEncoder.upgradeEncoding(user.getPassword());
if (upgradeEncoding) {
String presentedPassword = authentication.getCredentials().toString();
String newPassword = this.passwordEncoder.encode(presentedPassword);
user = this.userDetailsPasswordService.updatePassword(user, newPassword);
}
// AbstractUserDetailsAuthenticationProvider 를 호출
return super.createSuccessAuthentication(principal, authentication, user);
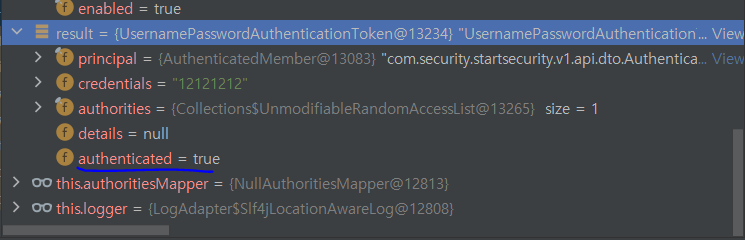
}5. super.createSuccessAuthentication(...) 메서드 내용.
여기서 UsernamePasswordAuthenticationToken은 로그인 요청을 했을 떄 생성했던 인증 토큰과 다르게
인증이 되었다는 값이 들어가 있습니다. ( authenticated = true )
protected Authentication createSuccessAuthentication(Object principal, Authentication authentication,
			UserDetails user) {
		UsernamePasswordAuthenticationToken result = UsernamePasswordAuthenticationToken.authenticated(principal,
				authentication.getCredentials(), this.authoritiesMapper.mapAuthorities(user.getAuthorities()));
		result.setDetails(authentication.getDetails());
		this.logger.debug("Authenticated user");
		return result;
	}
6. 인증이 완료된 토큰은 ProviderManager -> AbstractAuthenticationProcessingFilter 의 attemptAuthentication
메서드의 반환값으로 반환됩니다. ( 1번 과정 코드 )
그리고 인증 성공에 대한 메서드가 호출됩니다. => sucessfulAuthentication(...)
		// AbstractAuthenticationProcessingFilter
		try {
			Authentication authenticationResult = attemptAuthentication(request, response);

			// 생략

			successfulAuthentication(request, response, chain, authenticationResult);
		}
7. 인증이 완료되어서, SecurityContextHolder에 인증객체가 저장이 됩니다.
그리고, 추가적으로 자동로그인 설정을 통해 체크박스를 설정했다면 this.rememberMeServices.loginSuccess(..)의 내부 로직이 추가로 동작하게 됩니다.
protected void successfulAuthentication(HttpServletRequest request, HttpServletResponse response, FilterChain chain,
			Authentication authResult) throws IOException, ServletException {
		SecurityContext context = SecurityContextHolder.createEmptyContext();
		context.setAuthentication(authResult);
		SecurityContextHolder.setContext(context);
		this.securityContextRepository.saveContext(context, request, response);
		if (this.logger.isDebugEnabled()) {
			this.logger.debug(LogMessage.format("Set SecurityContextHolder to %s", authResult));
		}
		this.rememberMeServices.loginSuccess(request, response, authResult);
		if (this.eventPublisher != null) {
			this.eventPublisher.publishEvent(new InteractiveAuthenticationSuccessEvent(authResult, this.getClass()));
		}
		this.successHandler.onAuthenticationSuccess(request, response, authResult);
	}
8. 마지막으로, this.successHandler.onAuthenticationSuccess(...) 를 통해서 성공 이후에 대한 로직이 진행됩니다.
만약, 따로 커스텀해서 구현했다면 구현한 커스텀 클래스의 로직이 수행됩니다.
기본적으로 Security는 Form 형식을 따르기 때문에 특정 페이지로 Redirect 됩니다.
기본으로 사용하는 SuccessHandler는 SavedRequestAwareAuthenticationSuccessHandler 입니다.
구현을 하고 싶다면 AuthenticationSuccessHandler 를 구현하면 됩니다.
@Override
	public void onAuthenticationSuccess(HttpServletRequest request, HttpServletResponse response,
			Authentication authentication) throws ServletException, IOException {
		SavedRequest savedRequest = this.requestCache.getRequest(request, response);
		if (savedRequest == null) {
			super.onAuthenticationSuccess(request, response, authentication);
			return;
		}
		String targetUrlParameter = getTargetUrlParameter();
		if (isAlwaysUseDefaultTargetUrl()
				|| (targetUrlParameter != null && StringUtils.hasText(request.getParameter(targetUrlParameter)))) {
			this.requestCache.removeRequest(request, response);
			super.onAuthenticationSuccess(request, response, authentication);
			return;
		}
		clearAuthenticationAttributes(request);
		// Use the DefaultSavedRequest URL
		String targetUrl = savedRequest.getRedirectUrl();
		getRedirectStrategy().sendRedirect(request, response, targetUrl);
	}
해당 로직을 수행하면 이후에 Filter들을 거쳐서 로그인이 마무리 됩니다.
추가적으로 자동 로그인의 경우 공식홈페이지에 기재되어 있는 DB Table 형식에 맞춰서 Table을 만들어 두고 바로 사용할 수 있습니다.
'Back-End > Security' 카테고리의 다른 글
| Spring Security + JWT (2) (0) | 2022.04.18 |
|---|---|
| Spring Security + JWT (1) (0) | 2022.04.15 |
| Spring Security 동작 과정 (0) | 2022.04.15 |
| 서버와 토큰 기반 인증 시스템의 차이 (0) | 2022.04.15 |
